As a part of my journey into toy photography, I've started building sets for my figures, just walls, floors and forestry to add some flavour and get the most out of the figures I've collected over the years. While my most recent anime-related figure addiction has been Goodsmile's Figma range, I was also recently very taken with NECA's cartoon-inspired set of Teenage Mutant Ninja Turtles.
Because I'm a bit late to the party, I've been paying some atrocious aftermarket prices, with the Leonardo/Shredder 2-pack causing the most heartache. Happily I've managed to get the rest for under £100 a set, and even found the occasional bargain, such as the Triceraton/Roadkill Rodney set for £35. With such a high amount of investment, (and the arrival of a new office cabinet) I decided it was time to put my newfound crafty skills to the test and build the gang a lair. Which could then be invaded by baddies.
This is my account of that journey.
So to start with, I needed to figure out a focal point. Being a sewer, I really needed a pipe opening to provide a "bookend" to show where Shredder's minions were coming from. With that I'd need a floor and back wall, so that made things fairly simple - just measure the bottom of the cabinet, cut the styrofoam sheets to size, and then add detail. Simples.
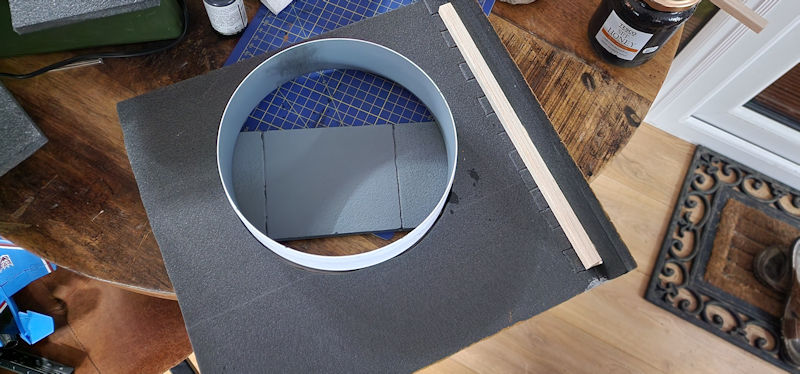
So I picked up flange pipe fitting from Ebay, which measured 20cm in diameter. This would create the "doorway" at the far side of the cabinet.
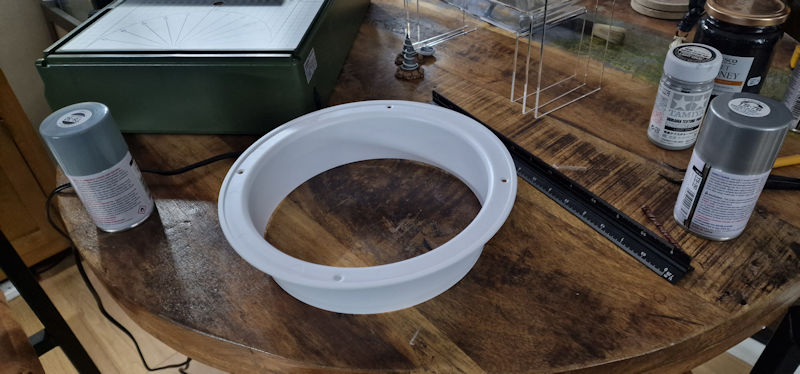
We all have to start somewhere...
So, having found a big ring of plastic, the next job was to create a surround. This entailed cutting out a square of styrofoam board, carving in some brick details which are given texture by rolling a rough stone across them (I found mine in the garden). Finally I just had to make a hole that the flange could slide into.
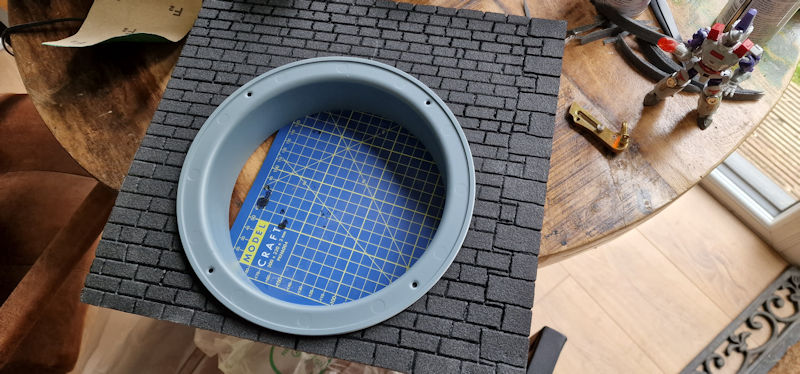
Ta da!
I wanted to use this wall for some colour tests. Going by the cartoon palette, the sewers were always a yellow/gold hue, so I managed to track down some acrylic paint on Amazon that did the trick - for the record it was Amsterdam Acrylic Natural Sienna, and as you can see below, it looks pretty good. For the greys, I used a flat light acrylic paint, and then applied some black wash to give them a bit of grit. I didn't use it on the bricks as I wanted them to maintain a brighter, cartoon look. The light drybrush gave enough detail to keep it interesting.
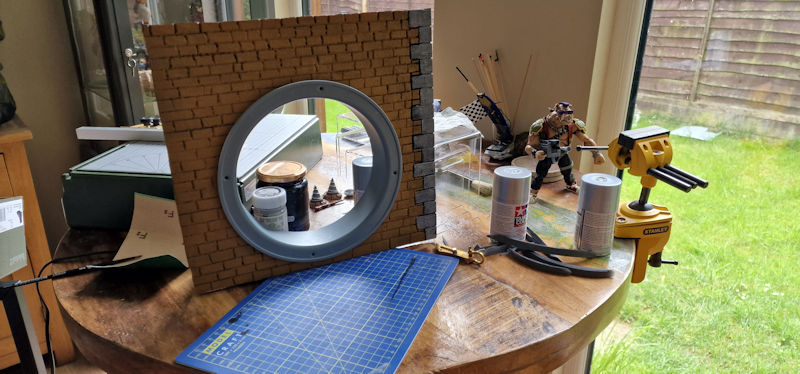
Lovely, cartoon accurate colour bricks - I painted a few of the bricks red and then dry brushed a light tan over the whole piece to mute and blend the colours together.
Before adding the paint, the base styrofoam board was covered in mod-podge mixed with black paint, which gives the material some protection and allows the paint to stick to the surface. There's some good videos on Youtube about how to mix Mod-Podge, the one I used was by Black Magic Craft and can be viewed here.
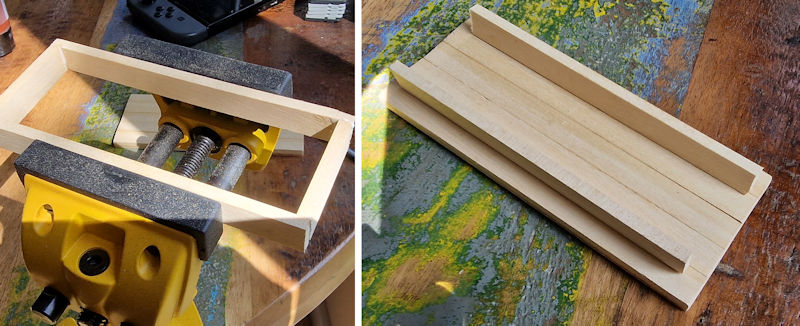
Knowing I would want to add some black paper to the back of the piece, and wanting to add some depth, I decided to build a side wall and top piece (along with a straight bit of foam along the bottom) to which I could attach the paper. This involved using some balsa wood to strengthen the connection between the foam pieces, the first application of which you can see here:
The "functional" back of the piece
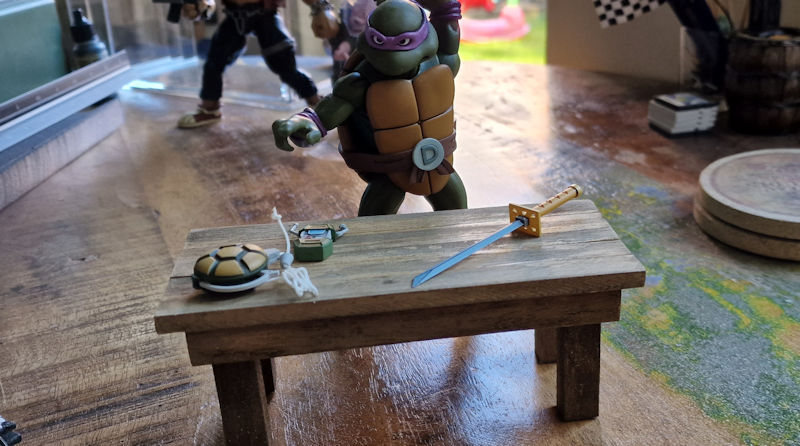
While I had the wood out, I decided to add some furniture to the lair. Nothing elaborate, just a table on which I could put some of the excellent accessories that NECA includes with their releases. For this I cut a piece of strip wood into pieces and glued them together to make a table top. From here I created a frame for the legs, which were all balsa wood. A bit of wood stain to age the piece and bring out the details, and et voila, Teenage Mutant Ninja Table.
So with that part done, all that was left was a floor and the back wall. The floor was a simple sheet with slabs carved into it and a straightforward grey, streaky paint application.
For the back wall, I needed bricks and something to break up the brick work. The first thing to do was cut the sheet, put in some bricks and then break it up with a pillar in the middle. I also wanted to add a sheet of plaster wall at one end, so that would give another dimension to the back of the cabinet and add some alternate texture. I wanted to add a pipe (a quick visit to a plumbing store got me some metal connectors and a pipe which were painted silver) and another larger sewer pipe. Everything was laid out as below.

With everything coming together, I did a quick test layout.
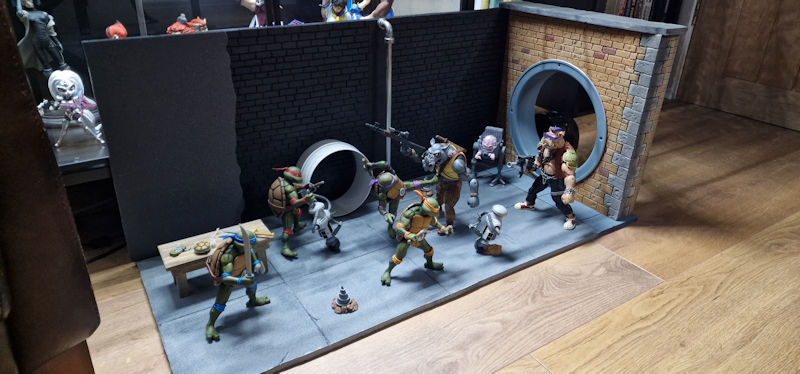
I was mostly happy with the layout, so it all came down to painting and some final touches.
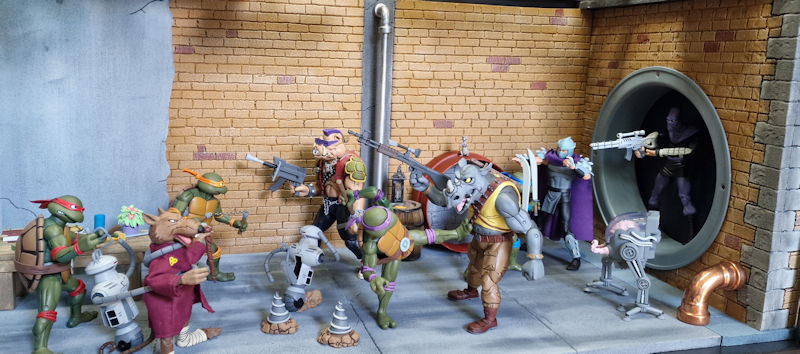
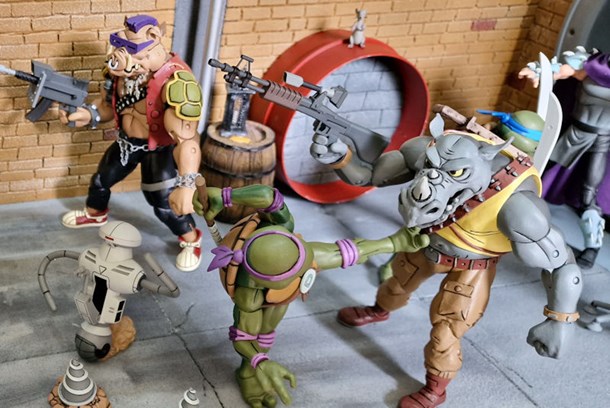
So as you can see, I've added the paint to the walls, popped the silver pipe in place, painted the second drainage pipe a dull red and filled it with some styrofoam bricks. For that last touch, I went with a grey breeze-block look to break it up from the rest of the rear wall. I peppered the scene with some more plumbing pieces and a barrel & lamp I had hanging around from another photo shoot.
There's some really lovely touches by NECA to their figures that allow for some extra dynamism in this scene. The Roadkill Rodney's came with a couple of drill heads and some displaced dirt, which makes it look like you have 4 drones in play instead of 2 - it's a really thoughtful inclusion and hats off to them for that. They also come with wraparound extended arms, which are putting Splinter in peril here, and to top it off there's also a spare head-topper that has space for Raphael's sai, allowing him to spear the robot through the head. Wonderful stuff.
Of course there's all the little extras that make great accessories - from the turtle-communicators to the plant, rat, sword and mutagen cannister sat on the table, it all adds a certain amount of authentic dressing to make it feel distinctly "turtles".
Aside from Rocksteady's leg snapping off due to terrible tolerance issues, the whole experience has been a real pleasure. I have plenty of leftovers from the 2-packs too, meaning I can change it up when I want to. I have two more foot-soldiers, Baxter Stockman as a fly and even a Triceraton that I can throw in the mix should the mood take me. I sold April because I though the head looked ridiculous, and rumours continue to spread (with some confirmation from NECA) that our brave reporter will have a modified "Ultimate" figure, so I'm waiting patiently for that.
I hope this build diary has given you some useful tips - honestly I'm not an experienced modeller, but having watched Youtube and picked up some great ideas from both Black Magic Craft and Richard's Creative Workshop, even a novice like me has been able to put together a pretty cool little diorama. If you have fun, you can buy more tools (as I have) to make life easier, but pick up the paints you need, some styrofoam board and a pencil, and you can pretty much create anything.
Follow A.I. on Twitter and Like us on Facebook to get all the latest site updates


